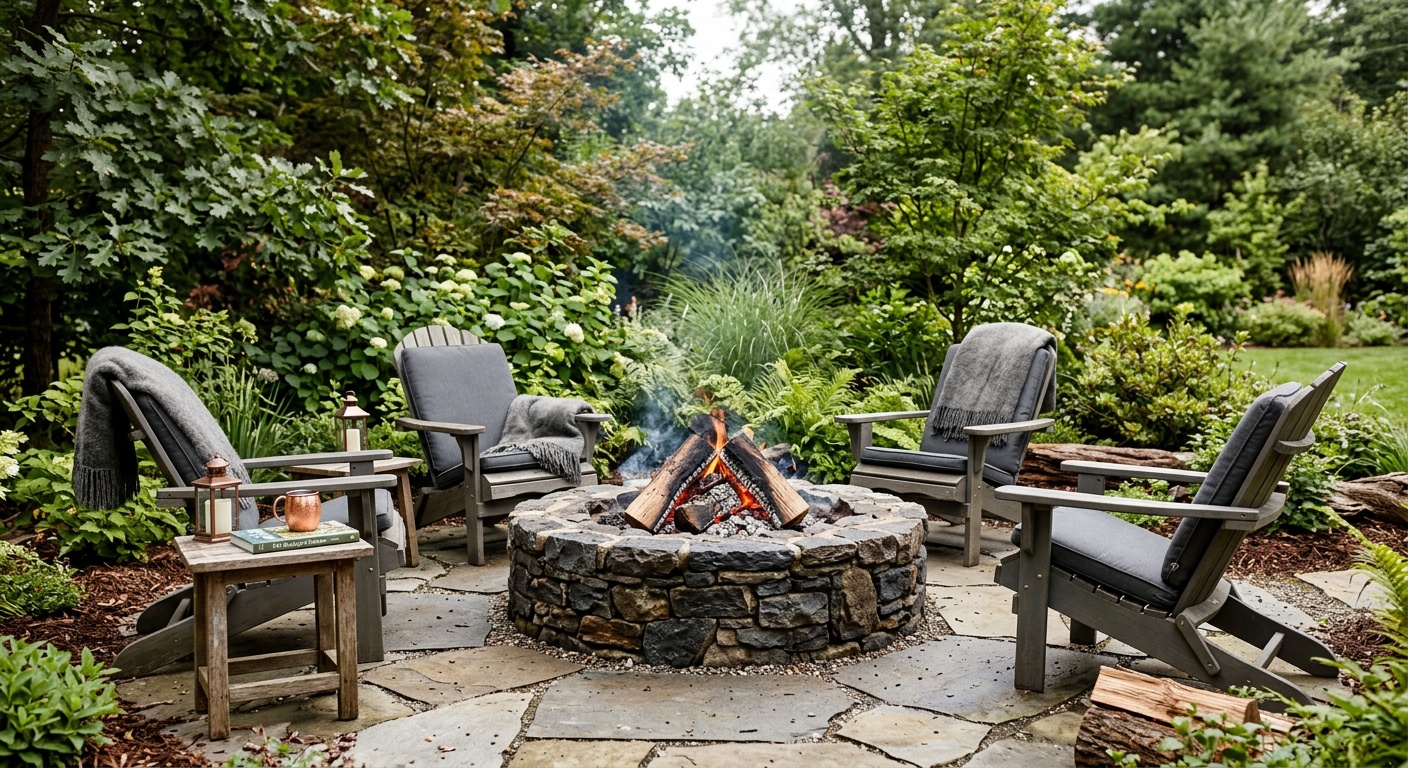
Fire Pit Installation Guide for Year-Round Backyard Use
Reading time: 14 minutes
Ever stared at a barren backyard and imagined it transformed into a warm, inviting gathering space that works in January just as beautifully as it does in July? You’re not alone. In 2026, outdoor living has become one of the most searched home improvement categories, and the fire pit sits squarely at the center of that movement.
Here’s the straight talk: A fire pit isn’t just a decorative feature — it’s an investment in your lifestyle. Done right, it extends your outdoor season by months, adds measurable property value, and creates the kind of ambiance that no smart lighting system or playlist can replicate. Done wrong, it becomes a hazard, a code violation, or an expensive eyesore.
This guide cuts through the confusion. Whether you’re a first-time installer or someone looking to upgrade from that wobbly ring you picked up at a big-box store, we’ll walk you through every decision point with precision and purpose.
Table of Contents
- Why Fire Pits Are Dominating Backyard Design in 2026
- Choosing the Right Fire Pit Type for Your Space
- Site Selection: The Make-or-Break Decision
- Step-by-Step Installation Process
- Optimizing for Year-Round Use
- Safety Standards and Local Codes
- Maintenance Routines That Extend Lifespan
- Frequently Asked Questions
- Light It Up: Your Fire Pit Action Plan
Why Fire Pits Are Dominating Backyard Design in 2026
The outdoor living market crossed the $60 billion threshold globally in 2025, and projections for 2026 push that figure toward $68 billion, according to the Outdoor Living Council’s annual industry report. Fire pits represent one of the fastest-growing segments within that category, with a 22% year-over-year increase in residential installations recorded across North America.
Why the surge? Three converging trends explain it perfectly:
- Remote and hybrid work culture: With more people spending daylight hours at home in 2026, the backyard has become both a workspace and a sanctuary. Evening fire pit gatherings offer a natural “reset” ritual.
- Wellness architecture: Landscape designers increasingly cite fire as a biophilic element — something that connects people to natural rhythms and reduces stress hormones measurably.
- Property value returns: A well-installed fire pit area can yield a 78–90% return on investment at resale, per the 2025 National Association of Realtors Remodeling Impact Report.
Consider Marcus and Jennifer Alvarez from suburban Denver. They invested $4,200 in a custom built-in gas fire pit in early 2025. By autumn, they estimated they had added roughly 60 additional evenings outdoors compared to the prior year — evenings that would previously have been lost to cold temperatures. When they listed their home in spring 2026, their real estate agent credited the outdoor fire area as a key selling point that helped them close at $18,000 above asking price.
“The fire pit is the new living room focal point — it migrated outside, and homeowners aren’t looking back.” — Sarah Templeton, Principal Designer at Outdoor Spaces Quarterly, 2026
Choosing the Right Fire Pit Type for Your Space
One of the most common mistakes homeowners make is selecting a fire pit based purely on aesthetics before considering their specific backyard context. Let’s examine your core options with honest clarity.
Wood-Burning Fire Pits
The original and still deeply beloved option. Wood-burning pits deliver an authentic crackling fire experience, real smoke aromatics, and zero fuel costs beyond the wood itself. They work beautifully in larger yards with good airflow and no HOA restrictions on open flames.
Best for: Rural or semi-rural properties, homeowners who enjoy the ritual of building fires, larger open spaces at least 15 feet from any structure.
Watch out for: Smoke drift (which can be a neighbor issue), ash disposal, and increasingly common municipal burn restrictions during high fire-risk periods. In 2026, over 340 municipalities across the U.S. have enacted seasonal wood-burning bans — a number that grew 14% from 2024.
Natural Gas and Propane Fire Pits
These are the fastest-growing segment in residential installations. Gas fire pits offer push-button ignition, adjustable flame height, zero ash, and consistent performance regardless of weather. Natural gas versions connect directly to your home’s gas line for unlimited burn time, while propane units offer portability.
Best for: HOA communities, urban and suburban yards, homeowners who want low-maintenance elegance, year-round daily use.
Take the example of Claire Wu in Seattle. She initially wanted a wood-burning pit but faced HOA restrictions and a covered patio overhang. Her landscape contractor recommended a natural gas fire table with a tempered glass wind guard. In her own words: “I use it four nights a week now. In January. In Seattle. That alone tells you everything.”
Propane Portable Units
Propane tabletop and freestanding units offer maximum flexibility. They’re ideal for renters, those with small patios, or anyone who wants the option to rearrange their outdoor layout seasonally. They require no installation permits in most jurisdictions and can typically be up and running within an hour of unboxing.
Gel and Bioethanol Fire Features
A growing niche in 2026, bioethanol fires produce clean, alcohol-fueled flames with no smoke and no gas line required. They’re popular in ultra-modern outdoor spaces but produce less heat than gas or wood options, making them more decorative than functional for cold-weather use.
Comparative Overview: Fire Pit Types at a Glance
| Feature | Wood-Burning | Natural Gas | Propane | Bioethanol |
|---|---|---|---|---|
| Avg. Installation Cost (2026) | $300–$1,500 | $1,200–$6,000 | $200–$3,000 | $150–$2,000 |
| Permit Required | Often Yes | Yes | Rarely | No |
| Heat Output (BTU range) | High (variable) | 30K–90K BTU | 30K–60K BTU | Low (6K–15K) |
| Year-Round Suitability | Moderate | Excellent | Good | Limited |
| Maintenance Level | High | Low | Low–Medium | Very Low |
Site Selection: The Make-or-Break Decision
Location isn’t just about aesthetics. A poorly placed fire pit creates safety hazards, code violations, and a miserable experience no matter how beautiful the unit itself looks. Here’s how to get it right.
Distance Rules You Cannot Ignore
Most municipal fire codes and the National Fire Protection Association (NFPA) align on the following minimum clearances for residential fire pits:
- 10–15 feet minimum from any structure (home, fence, shed, pergola)
- 10 feet minimum from overhead obstructions like tree branches or patio covers
- 25 feet minimum from dry vegetation, mulch beds, or combustible landscaping materials
- Check setback from property line — typically 5–10 feet depending on local ordinance
Pro Tip: Don’t measure from your back door. Measure from the nearest wall of the structure, including any deck railing or fencing.
Surface and Ground Considerations
The surface beneath your fire pit matters enormously — both for safety and longevity. Your installation surface will determine what preparation work is needed before the first flame is ever lit.
- Concrete or pavers: The gold standard. Non-combustible, stable, and easy to maintain. Install a minimum 12-inch non-combustible pad extension around the fire pit perimeter.
- Grass or lawn: Requires a heat shield or elevated pedestal design. Repeated heat exposure kills grass and can crack compacted earth beneath, causing shifting over time.
- Gravel or decomposed granite: An excellent and budget-friendly option. Naturally non-combustible and provides drainage. Minimum 4-inch depth recommended.
- Wood decking: Requires significant precaution. Only gas fire tables specifically rated for deck use (with heat deflection ratings) should be placed here, and always with a non-combustible deck protector mat beneath.
Drainage and Elevation
Don’t overlook drainage. A fire pit installed in a low-lying area of your yard will collect standing water during rain events, accelerating rust, damaging burner components, and creating a breeding ground for mosquitoes. Slight elevation or proper drainage channels are essential for any permanent installation.
Step-by-Step Installation Process
We’ll walk through a built-in gas fire pit installation since it represents the most involved process and covers principles applicable to simpler installations as well. For wood-burning or portable propane setups, many of these steps are simplified or eliminated.
Phase 1: Planning and Permits
- Check local codes: Contact your municipality’s building department. In 2026, online permit portals exist in most cities, making this a 20-minute process rather than a bureaucratic ordeal. Search “[Your City] outdoor fire pit permit” to find your local portal.
- Call 811 (U.S.) before digging: This is legally required. The national “Call Before You Dig” service marks underground utilities within 2–3 business days, preventing potentially fatal gas line or electrical strikes.
- Draw a scaled site plan: Mark your house, property lines, utilities, existing landscaping, and proposed fire pit location. This is required for most permit applications and invaluable for your own planning.
- Hire a licensed gas plumber: Any connection to a natural gas line must be performed by a licensed professional in virtually all jurisdictions. Budget $300–$800 for this component separately.
Phase 2: Ground Preparation
- Excavate the base area: Remove sod and excavate 6–8 inches of soil in the installation footprint plus 18 inches on all sides for paver surround.
- Compact the subbase: Add 4 inches of crushed gravel (¾-inch angular gravel is ideal) and compact with a plate compactor. Rent one from any tool rental shop for approximately $75/day.
- Install sand setting bed: For paver installations, add 1 inch of coarse bedding sand over the compacted gravel. Screed level using a straight 2×4.
- Lay fire pit surround pavers: Install your chosen pavers or stone, checking for level continuously with a 4-foot level. Leave a 1/8-inch gap between units for polymeric sand.
Phase 3: Building or Placing the Fire Pit Structure
- For masonry builds: Use fire-rated mortar (not standard mortar) when laying block or stone. Fire brick or refractory concrete block is required for the interior bowl of wood-burning installations.
- For prefabricated insert installs: Set your manufactured fire pit insert or fire table according to manufacturer specifications. Most specify a minimum non-combustible surround thickness.
- Install the gas line rough-in: Your licensed plumber should complete this step before the structure is fully enclosed. Gas lines require a shutoff valve accessible without tools within 6 feet of the appliance.
- Pressure-test the gas line: Mandatory before first use. Your plumber will perform this with a manometer; any drop in pressure indicates a leak that must be repaired before proceeding.
Phase 4: Final Assembly and First Fire
- Install fire media: For gas fires, lay your lava rock, fire glass, or ceramic logs according to the manufacturer’s pattern. Incorrect media placement can create flashback hazards or uneven flame patterns.
- Perform leak check: Before the first ignition, apply soapy water to all gas connections and valves. Bubbling indicates a leak — address before lighting.
- First burn at low setting: For new masonry installations, cure the mortar gradually with three progressively longer burns over 48 hours before burning at full capacity.
- Install any accessories: Wind guards, spark screens, covers, and seating arrangements complete the installation.
Optimizing for Year-Round Use
This is where most fire pit guides fall short. Getting a fire pit installed is one thing. Making it genuinely functional through winter, spring rain, summer heat, and fall wind is an entirely different discipline.
Cold Weather Strategies
Natural gas and propane fire pits are actually more efficient in cold weather — cooler ambient air increases the temperature differential and perceived warmth. But there are specific considerations:
- Wind protection is non-negotiable: A pergola with removable side panels, a low garden wall, or purpose-built glass wind screens can make a 35°F evening genuinely comfortable. Studies on perceived warmth consistently show that wind is the primary comfort variable, not temperature alone.
- Propane regulators can freeze: Below 20°F, propane regulators sometimes freeze due to moisture in the gas line. Use a regulator cover and consider a tank warmer if you’re in a cold climate.
- Seat cushions matter: Cold stone or metal seating pulls body heat aggressively. Outdoor-rated cushions rated to 0°F are widely available in 2026 and represent an inexpensive investment that dramatically extends your comfortable use window.
- Pair with a patio heater: Combining your fire pit with one or two overhead patio heaters creates a “warm zone” effect that can keep a seating area comfortable in temperatures as low as 20°F.
Rainy Season Management
For gas fire pits, a properly fitted cover is your most important accessory. Moisture intrusion into gas lines and burner components is the leading cause of premature failure. Use a marine-grade, UV-resistant cover rated for your specific model. In 2026, custom-fit covers for most major fire pit manufacturers run $45–$150 and are absolutely worth the investment.
For wood-burning pits, keep your firewood stored off the ground under a covered woodshed at minimum 20 feet from the fire pit itself (fire code in most states requires this separation). Seasoned, covered wood is the single biggest factor in fire quality and smoke reduction.
Summer Heat Strategies
Counterintuitively, fire pits in summer need different management. Use the lower BTU settings on gas fires during warm months — a gentle, visual flame rather than maximum heat output. In summer, a fire pit becomes more of an ambiance element than a heat source, and low flickering flames with fire glass are aesthetically appropriate and comfortable even on warm evenings.
Safety Standards and Local Codes
In 2026, the Consumer Product Safety Commission (CPSC) reports that residential fire pit incidents result in approximately 5,700 emergency room visits annually in the U.S., with the majority attributed to improper installation, unsupervised use around children, and burn bans violations. Here’s how to keep your installation firmly on the right side of these statistics.
Essential Safety Equipment for Every Installation
- Spark arrestor screen (wood-burning pits): Required by law in many high fire-risk states including California, Oregon, and Colorado in 2026
- CO detector nearby: For enclosed or semi-enclosed patio areas with any combustion appliance
- Class ABC fire extinguisher: Within 10 feet of any fire feature, accessible without obstruction
- Emergency shutoff clearly labeled (gas installations): Every member of your household should know exactly where it is and how to use it
Quick Scenario: Imagine your gas line fitting develops a slow leak while the fire is lit. Do you know the sequence of actions? Turn off the ignition, locate the shutoff valve (hopefully you know exactly where it is), close it, move everyone away, ventilate the area, and call your gas company. This sequence should be as automatic as a fire drill — rehearse it with your household once a year.
Maintenance Routines That Extend Lifespan
A well-maintained fire pit can last 15–25 years. A neglected one might not survive its third winter. Here’s a practical seasonal maintenance framework:
Monthly (Active Season)
- Inspect all gas connections with soapy water solution
- Clear debris from burner ports with a soft brush
- Check for rust spots on metal components; address with high-temperature paint immediately
- Remove and wash fire glass or lava rock if discolored (annual is fine; monthly if heavy use)
Seasonal Transition Checklist
- Spring startup: Full inspection of gas line, check igniter battery/spark function, inspect refractory materials for winter cracks, verify cover integrity
- Fall shutdown (for climates with harsh winters): Purge gas lines with your plumber if in freeze-prone area, store fire glass indoors, apply rust-inhibitor to exposed metal, install weatherproof cover
Year-Round Usage by Season: Homeowner Survey Data (2025)
How often do homeowners use their fire pit by season?
Source: Outdoor Living Consumer Survey, 2025 (n=2,340 U.S. homeowners with installed fire pits)
Frequently Asked Questions
Do I need a permit to install a fire pit in my backyard?
It depends on your fire pit type and your local jurisdiction. Wood-burning fire pits and built-in gas fire pit structures typically require permits in most U.S. cities and counties. Portable propane fire pits generally do not require permits but may still be subject to local burn ordinances. The safest approach in 2026 is to check your city’s online permit portal or call your local building department before any installation begins. Permit applications for fire pits are generally straightforward and typically cost between $50–$150. Skipping this step can result in fines, mandatory removal, or complications with your homeowner’s insurance in the event of an incident.
What is the best fire pit option for a small urban backyard?
For small urban spaces — typically under 400 square feet of usable yard — a gas fire table or a low-profile propane fire pit insert is the most practical choice. These options provide adjustable, controllable flames without the smoke drift that causes friction with close neighbors, and they fit within the tighter clearance constraints of smaller lots. Fire tables that double as outdoor dining or lounge tables are especially efficient for small spaces, serving a dual function without consuming additional square footage. Look for units with built-in wind guards and covers for maximum utility. Brands like Solo Stove, Hearth Products Controls, and American Fire Glass all offer compact options specifically engineered for urban patios in their 2026 product lines.
How do I protect my fire pit from rust and weather damage during winter?
Rust and weather degradation are the primary enemies of fire pit longevity. The most effective protection strategy combines three elements: a high-quality, custom-fit weatherproof cover (marine-grade 600D polyester or better), a light application of high-temperature spray paint or clear sealant on any exposed steel or cast iron surfaces at the start of each fall season, and storing removable components like fire glass, lava rock, and burner inserts indoors during prolonged non-use periods in cold climates. For built-in structures, inspecting the mortar or grout lines annually and repointing any cracks before winter prevents water infiltration and freeze-thaw damage to masonry. These steps collectively can extend your fire pit’s functional lifespan by 8–12 years compared to untreated units left exposed year-round.
Light It Up: Your Fire Pit Action Plan
You now have everything you need to move from concept to crackling flame. Let’s compress it into a clear, sequential action plan you can start this weekend:
- Week 1 — Research and permissions: Identify your fire pit type based on your yard size, HOA rules, and usage goals. Visit your city’s permit portal and confirm requirements. Call 811 to schedule utility marking for any planned excavation.
- Week 2 — Site selection and measurement: Apply the clearance rules, assess your drainage situation, and finalize your surface material. Take photographs and measurements for your permit application and contractor quotes.
- Week 3 — Contractor and materials selection: For gas installations, obtain at least three quotes from licensed contractors. For DIY wood-burning or propane setups, source your materials from a dedicated outdoor living retailer rather than a generic big-box store for better quality and expert guidance.
- Week 4–5 — Installation: Execute your installation in phases as outlined in this guide. Don’t rush the foundation preparation — it is the least glamorous and most structurally important step.
- Ongoing — Optimize for year-round use: Invest in wind protection, quality seating cushions, and a proper cover from day one. Schedule your first annual maintenance check each spring.
As outdoor living continues its evolution in 2026 and beyond, the fire pit is becoming less of a luxury amenity and more of a standard feature in thoughtfully designed homes — as expected as a kitchen island or a primary bathroom soaking tub. The homeowners who install well now are building outdoor spaces that will serve their families and their property values for decades.
Here’s your question to sit with: What would your backyard life look like if you had 60 more evenings outdoors each year? That’s not a hypothetical — for many homeowners with the right fire pit setup, it’s the documented reality. The only variable is when you decide to start.
Article reviewed by Gary Kowalski, Structural Demolition & Load-Bearing Analysis Expert, on June 8, 2026